
Quale attività vuoi creare?
How to activate In App Purchase(IAP) in your app?
Follow steps below to easily activate In App Purchase in your app:
Step 1 : Go to Google Play Console
Step 2 : If you have a Google account, login, else create account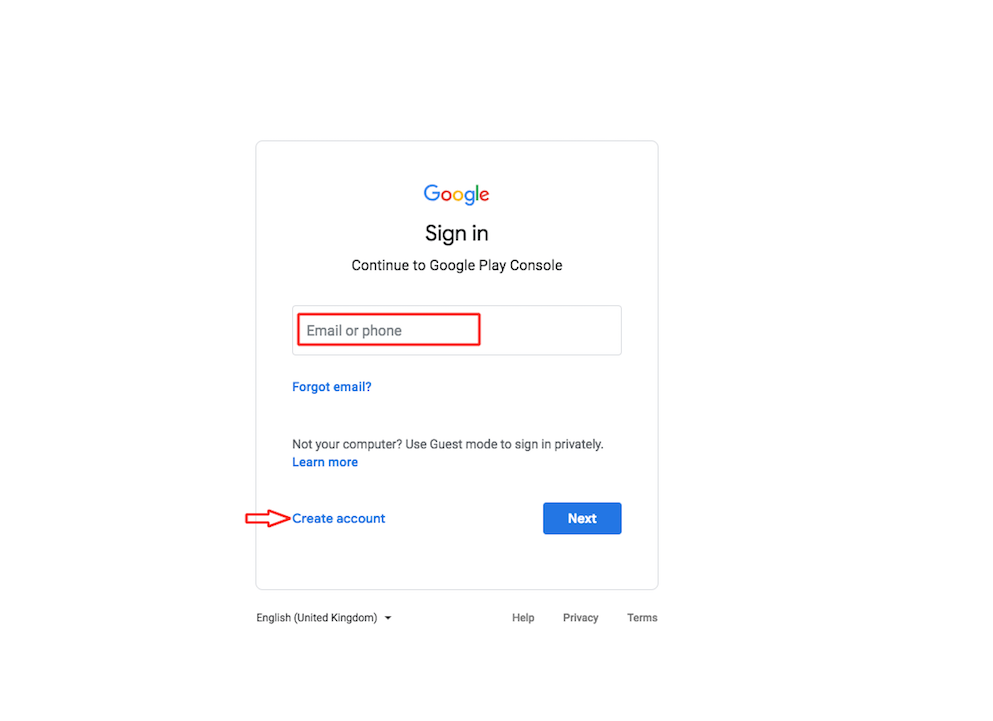
Step 3 : On the dashboard, click on Create Application
Step 4 : A popup will open. Select the default language, enter title and click on Create
Step 5 : Enter short and full description. Once you are finished, click on Save Draft and go to App Releases 
Step 6 : Click on Manage in Internal Test Track

Step 7 : Click on Create Release

Step 8 : Click on Continue
Step 9 : Upload Android App Bundles and APKs, and provide a Release Name

Step 10 : Click on Save, then go to In-app Products

Step 11 : Click on Create Managed Product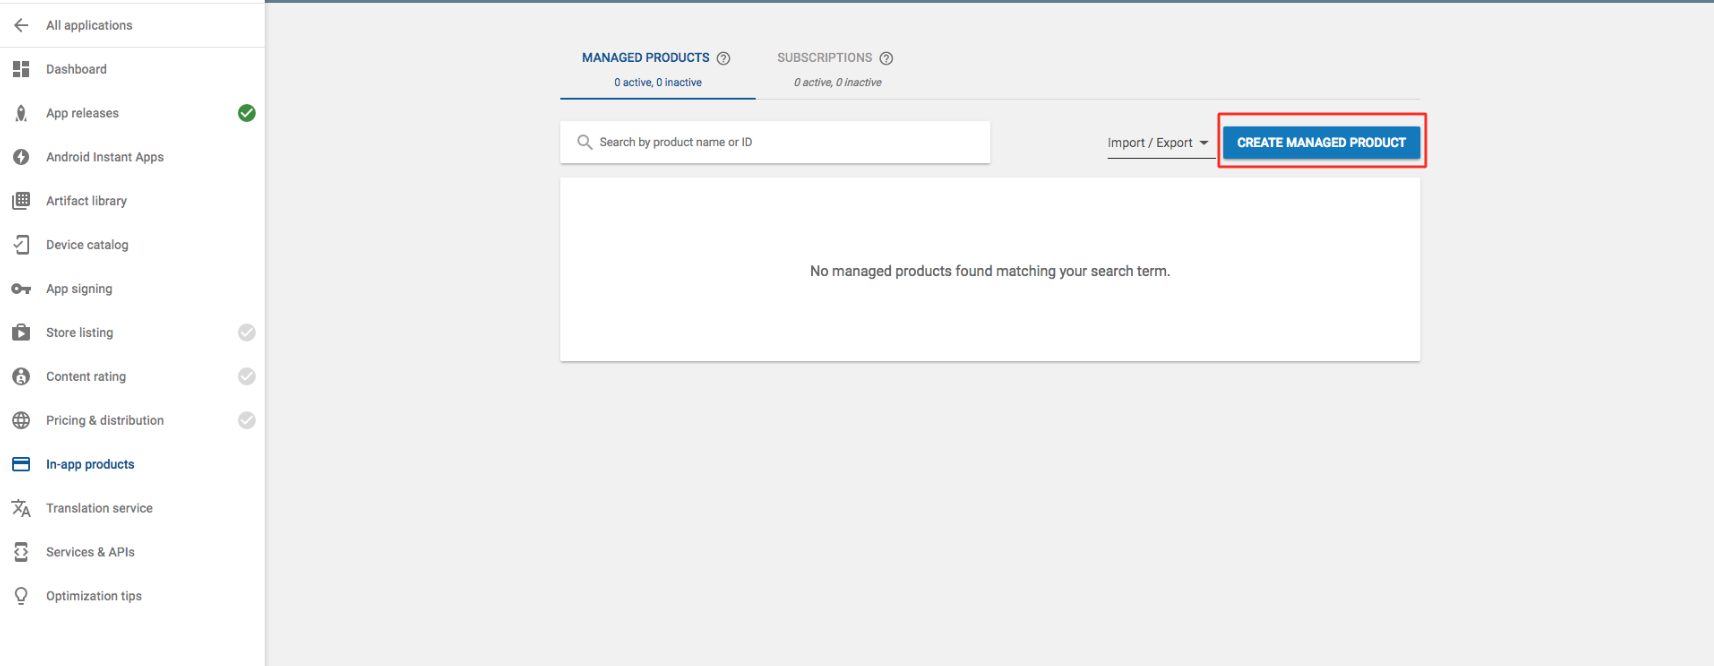
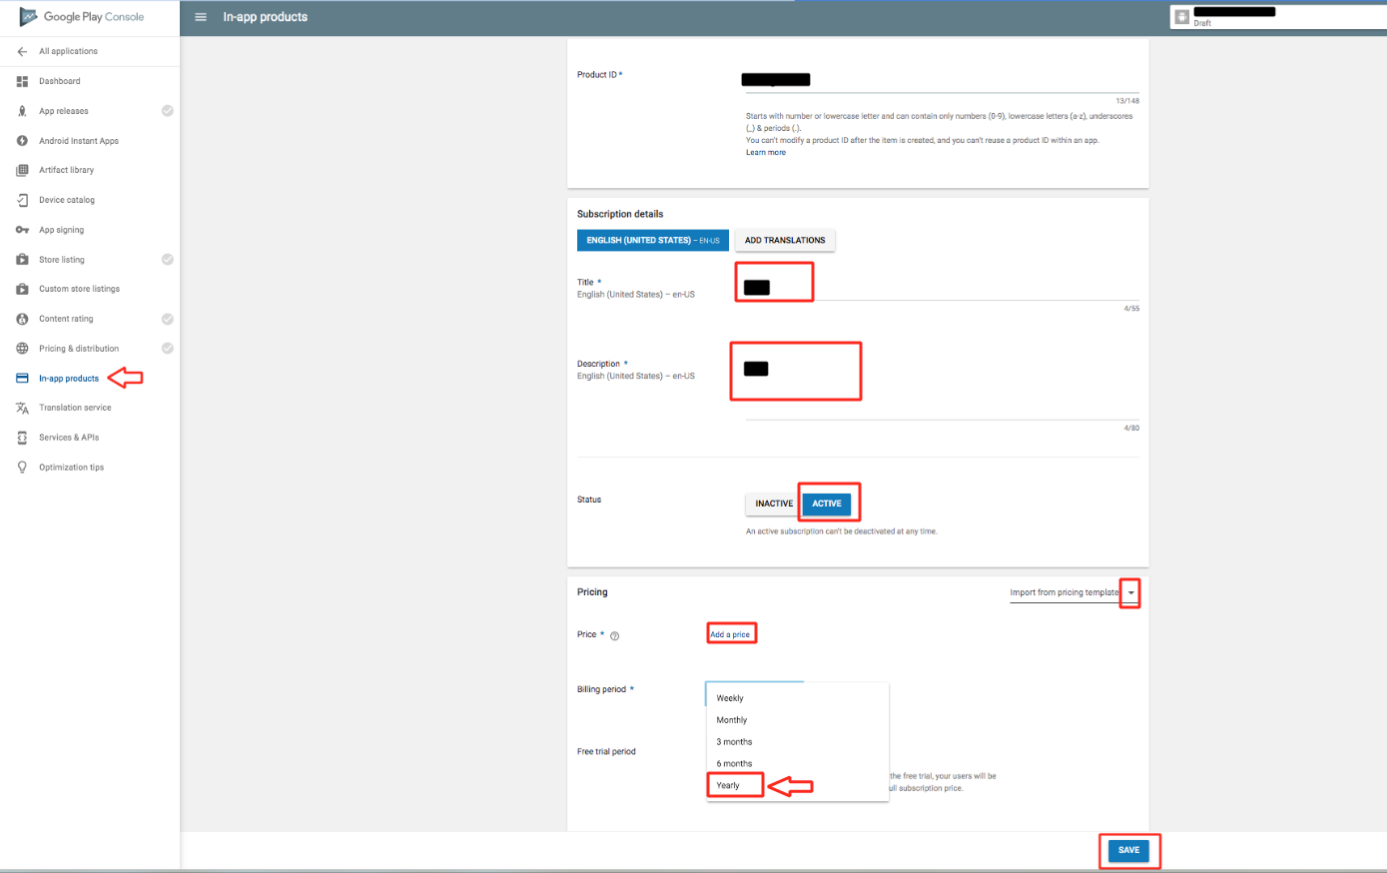
Step 12 : Provide Product ID, Tile and Description, then set the status to active. You can now select a pricing template or add your own price. Once you are finished, click on Save and go to In-app products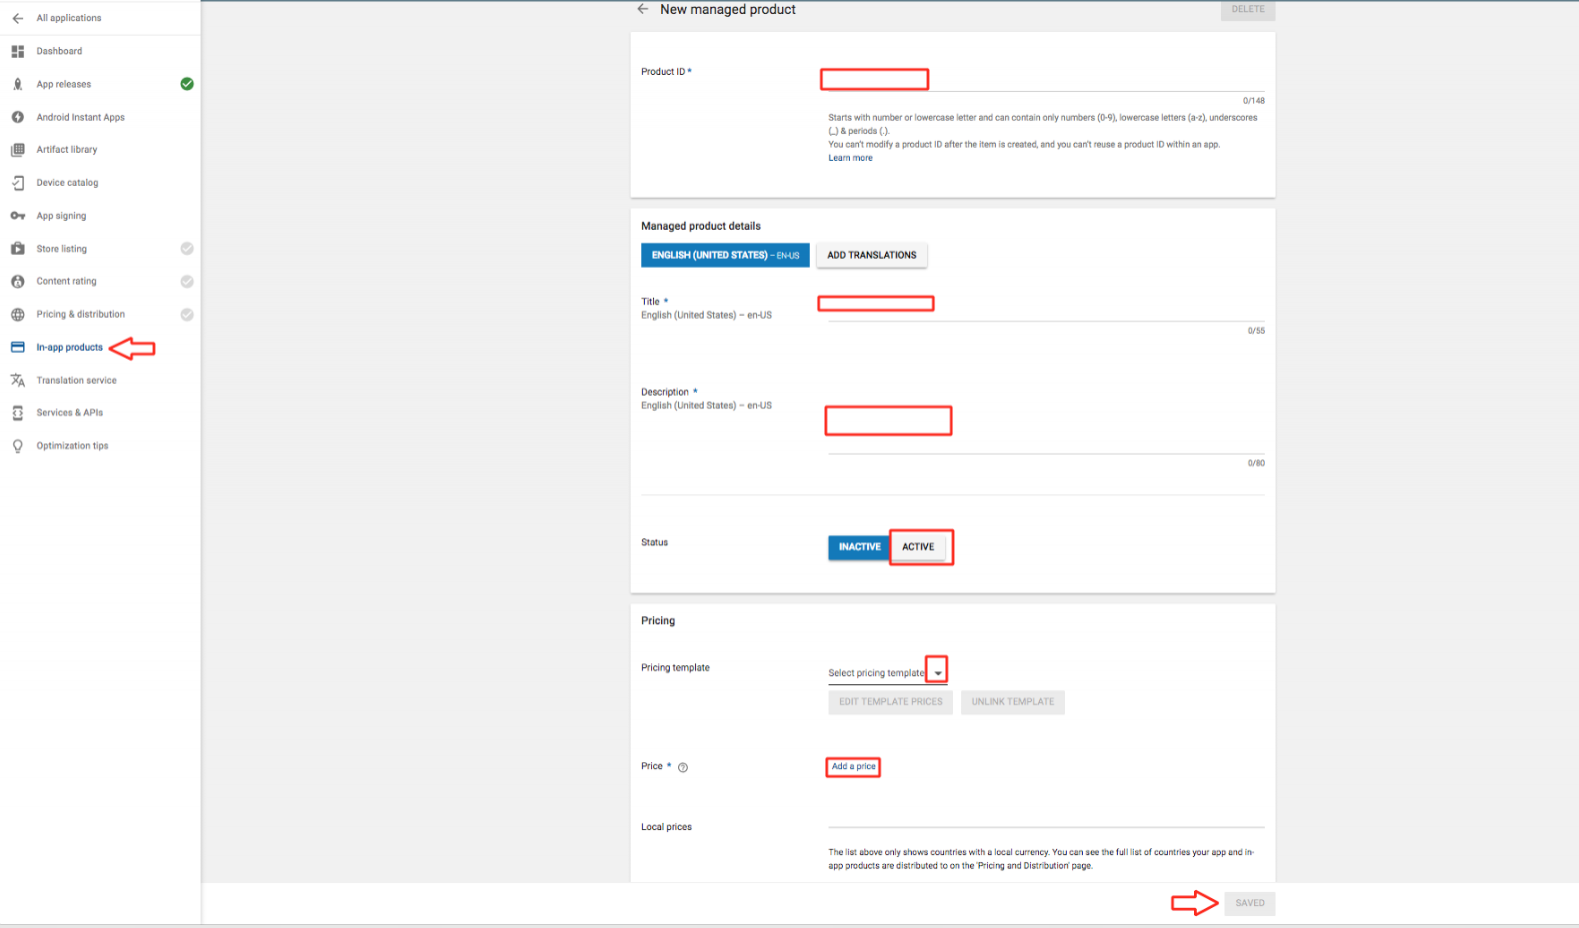
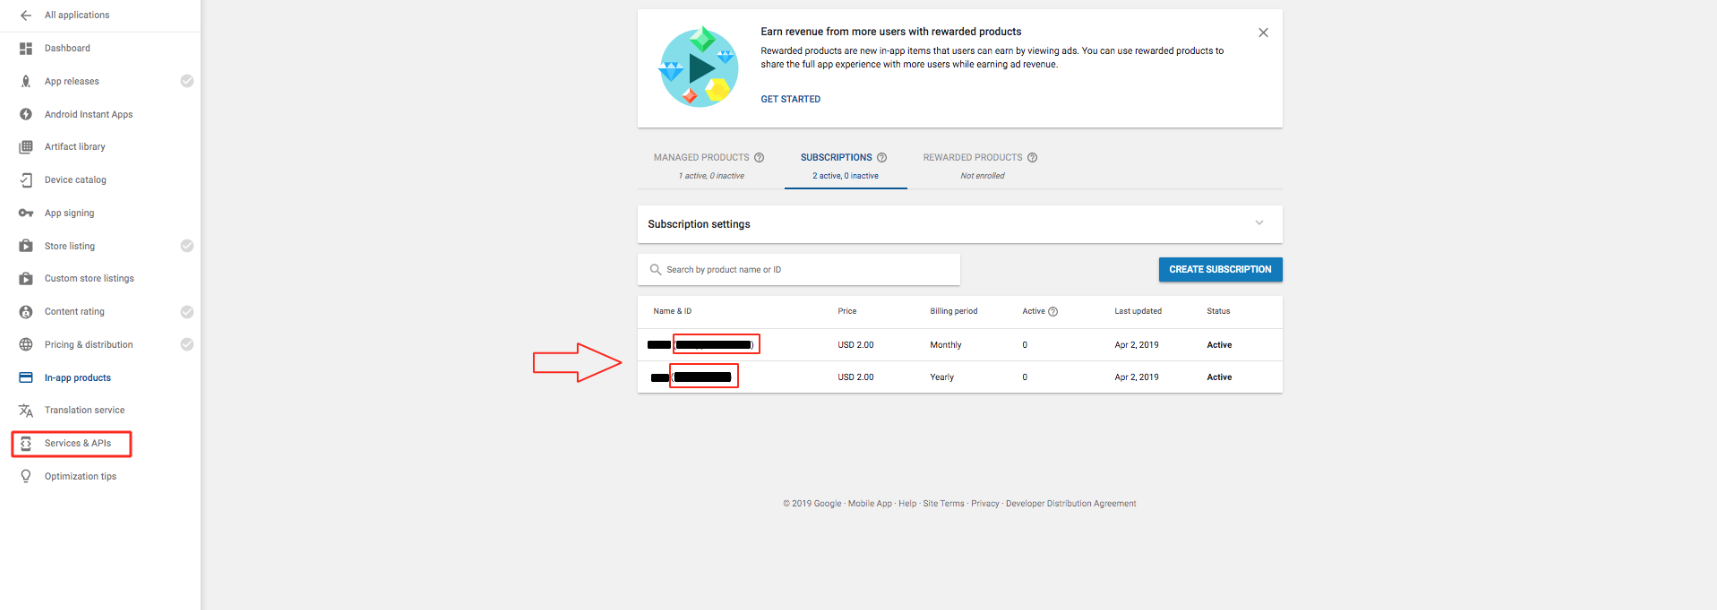
Step 13 : Under Managed, you will see your One Time Product ID, copy it. Now switch to Subscription tab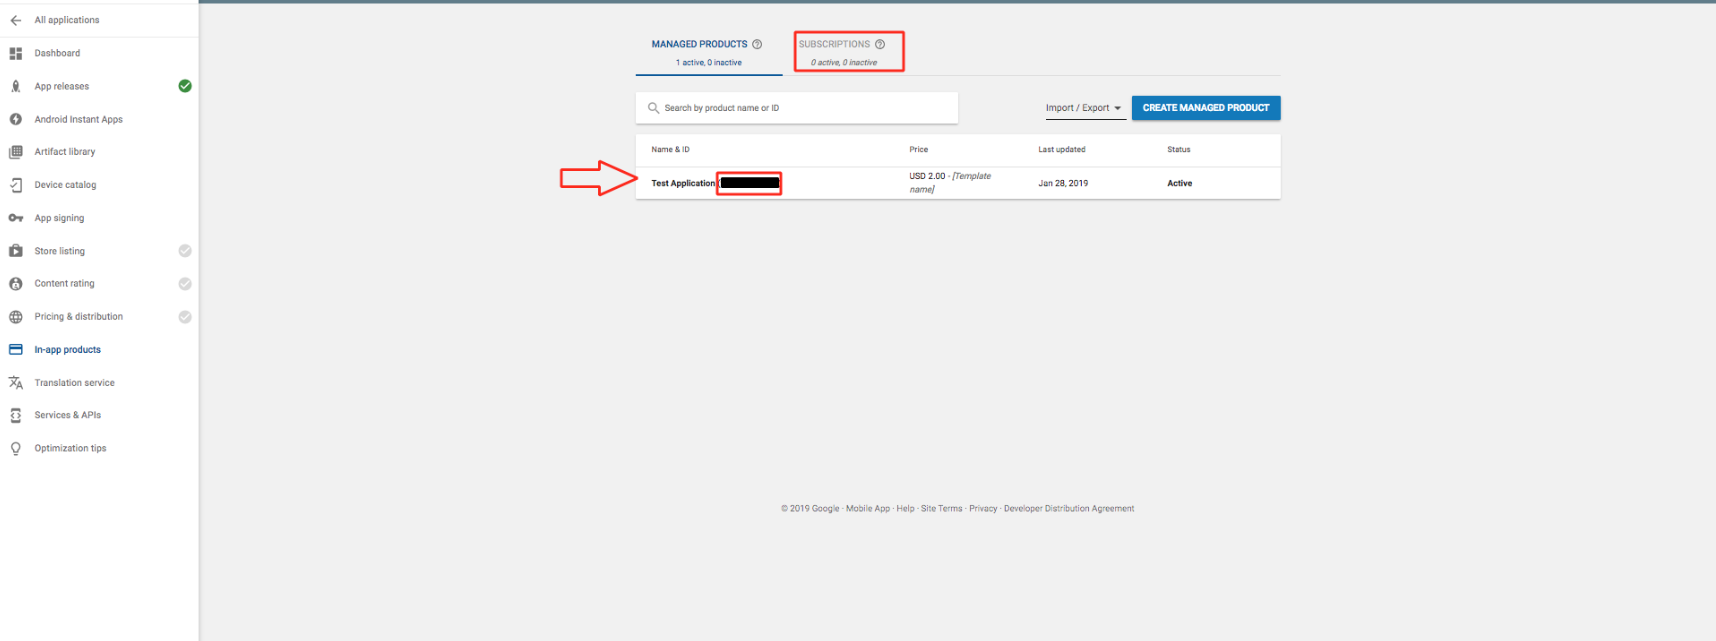
Step 14 : Click on Create Subscription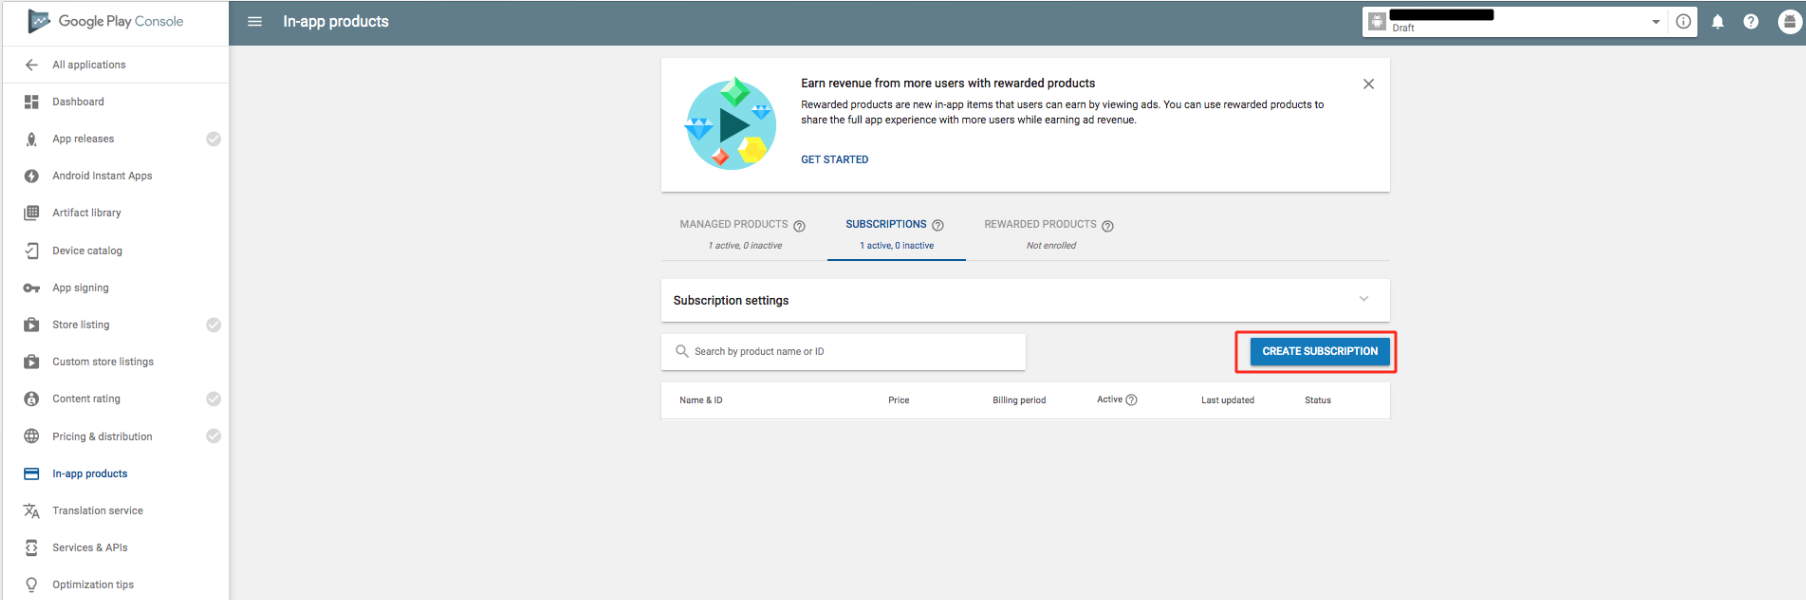
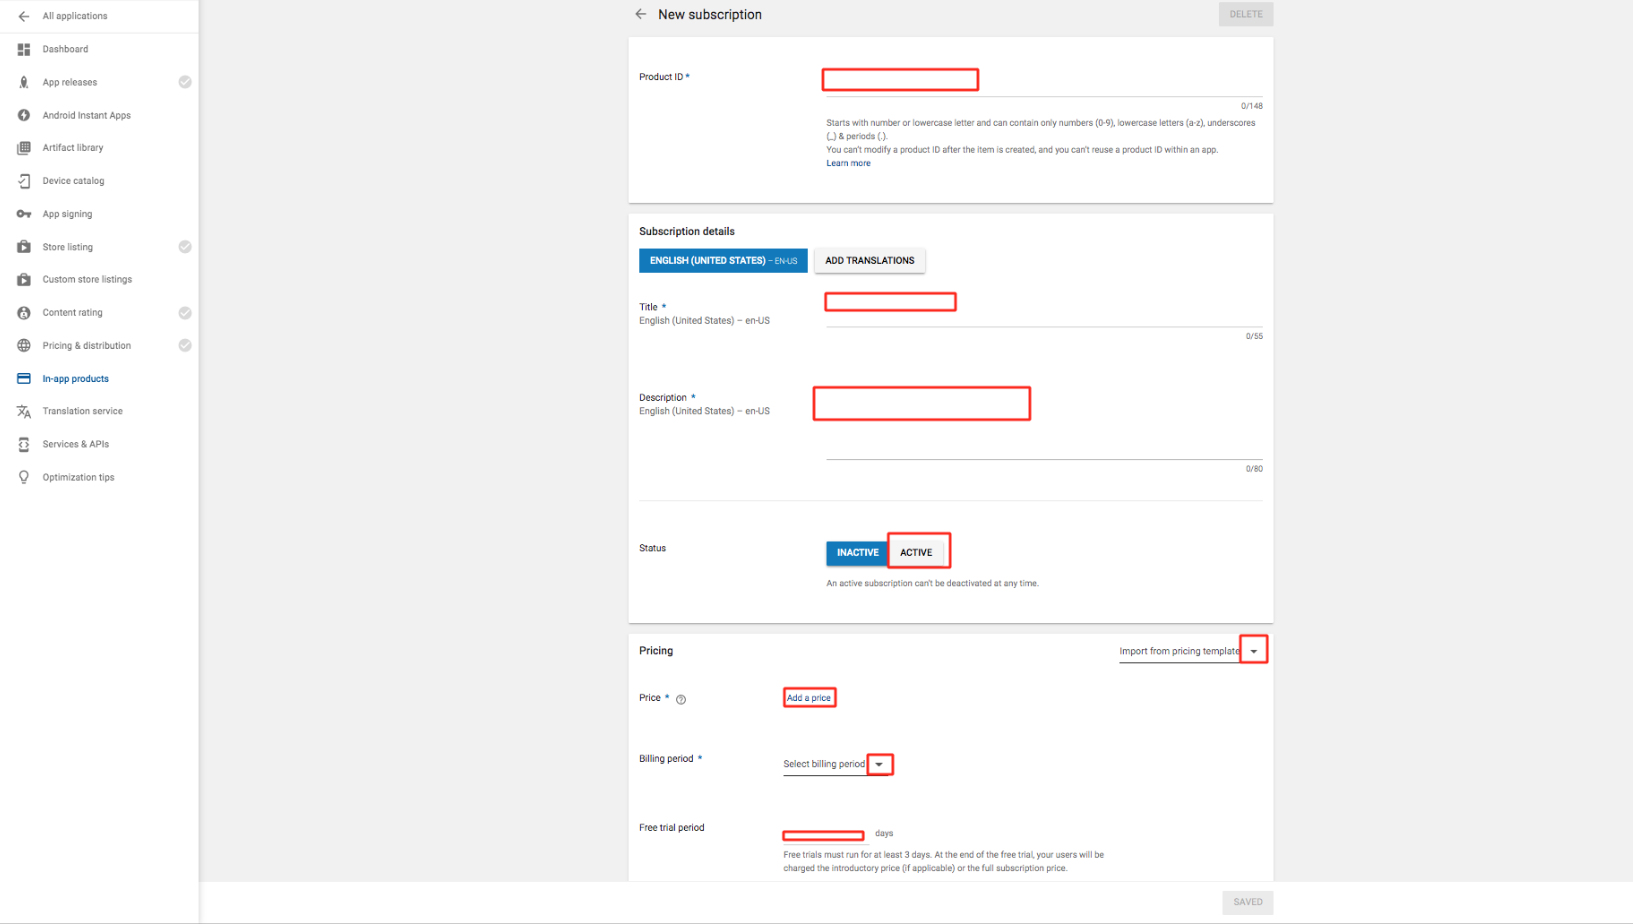
Step 15 : Provide Product ID, Tile and Description, then set the status to active. If you want you can import pricing from a template or add your own by entering the price value, and selecting the billing period. You can even enable free trial by providing the number of days
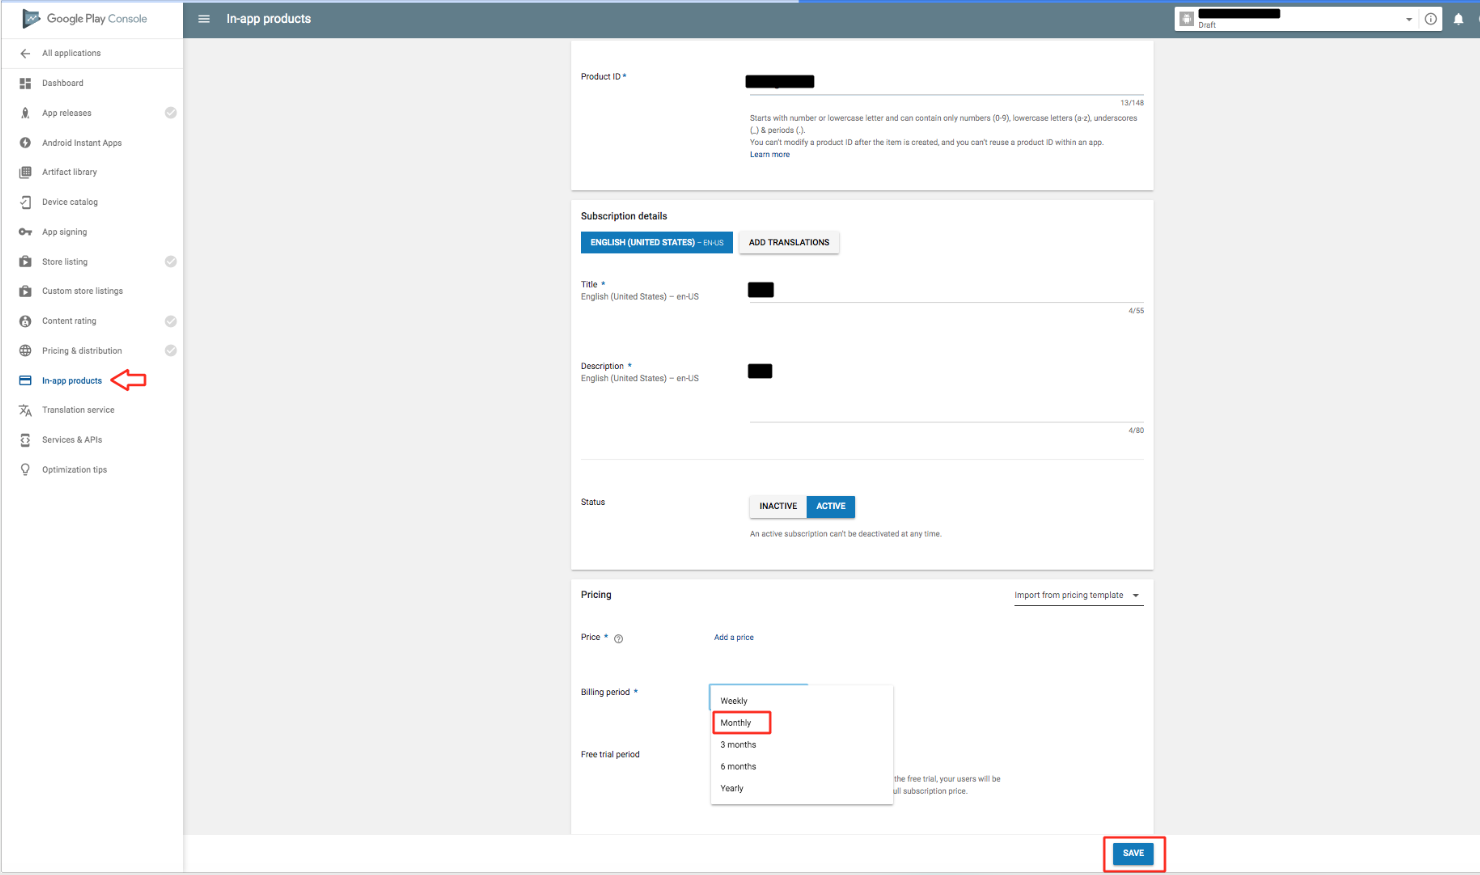
Step 16 : Select monthly billing period and click on Save
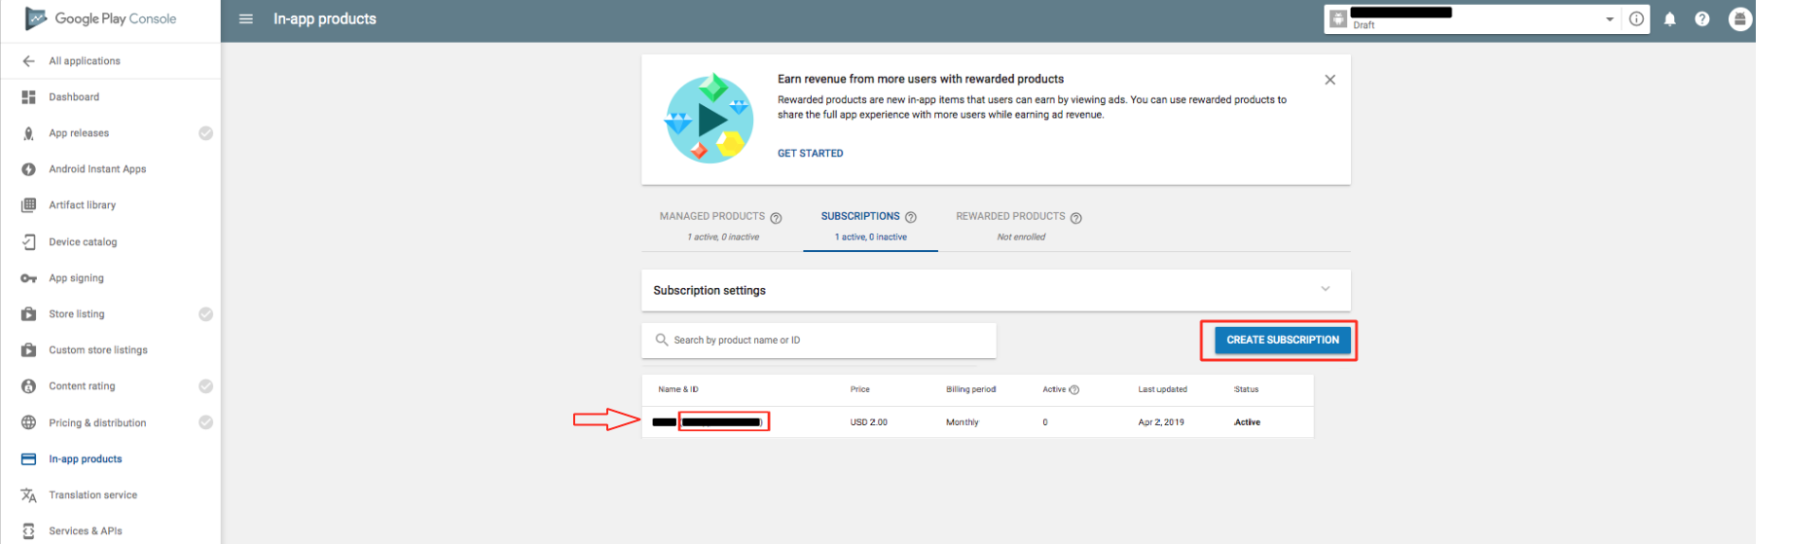
Step 17 : Once again click on Create Subscription
Step 18 : Enter all the details and select yearly billing period this time. Once you are finished click on Save
Step 19 : Under Subscription, you will see Monthly and Yearly Subscription Package IDs, copy them too. Then, go to Services & APIs
Step 20 : Here is your Public Key, copy it too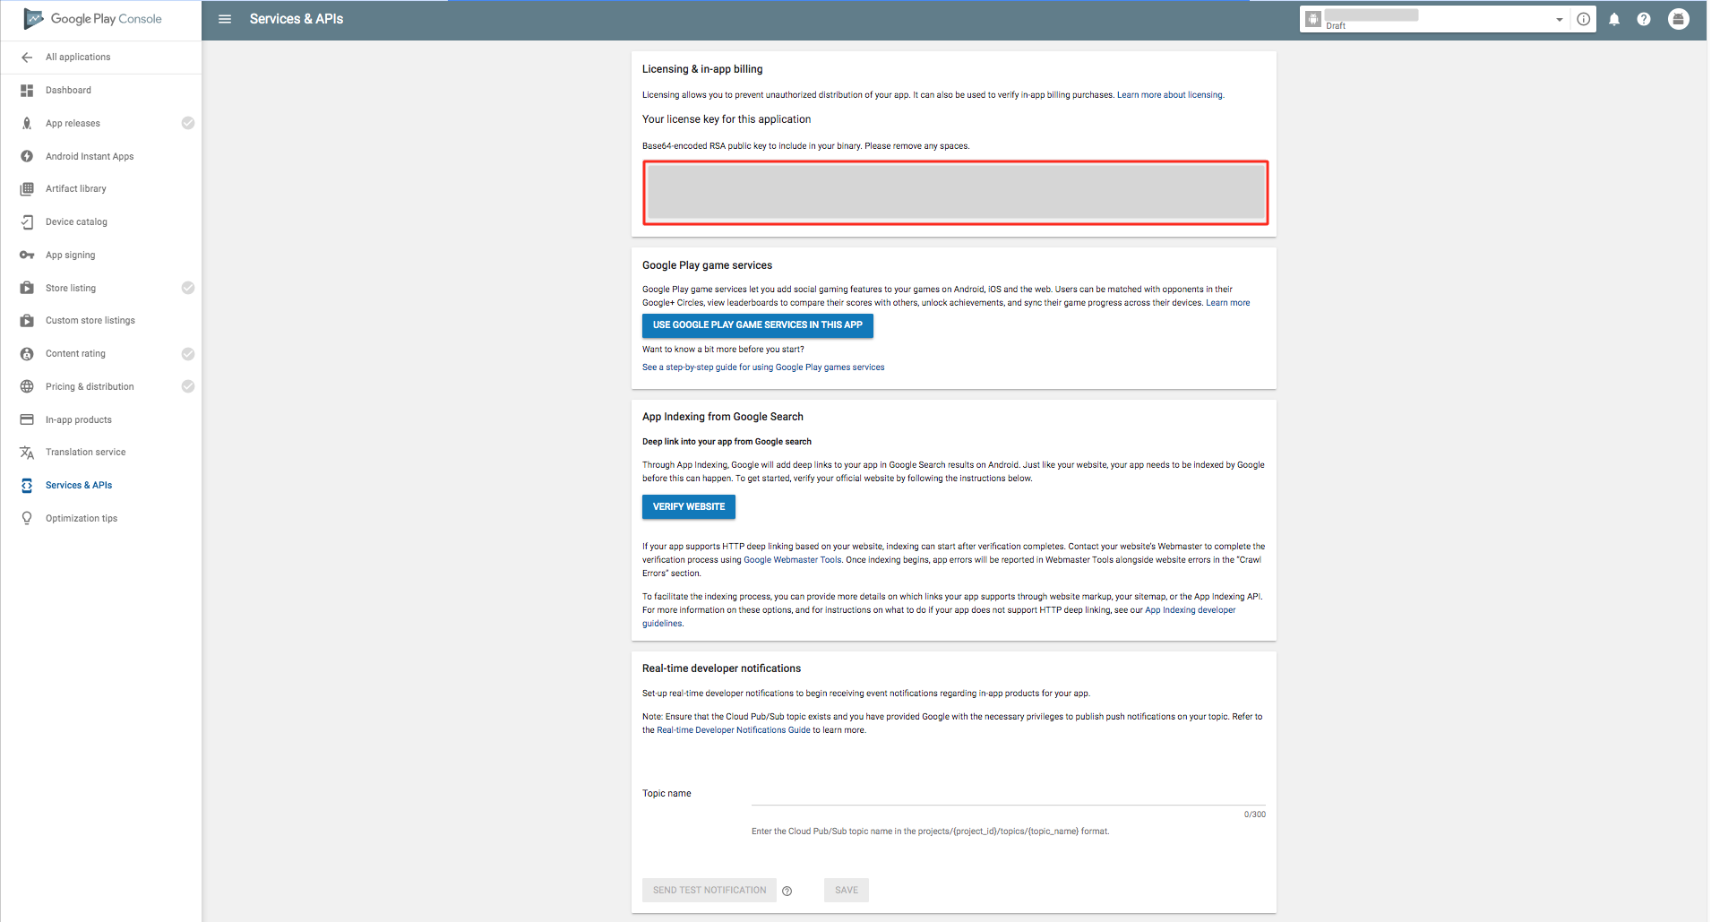
Step 21 : Now paste all the package IDs and public key in their respective fields on creator software

Questo articolo è stato utile
Questo articolo è stato utile
Grazie per il tuo feedback!
- Aderire
- Registrati
